Are you currently hunting for selective information around Toilet Flange Repair?
Intro:
Recognizing the Importance of a Toilet Flange:
In the realm of plumbing, the often-overlooked commode flange plays a crucial function in making sure the smooth operation of your bathroom components. Acting as an important connector between your toilet and the underlying waste pipe, the bathroom flange works as the unhonored hero of your plumbing system. Without this durable part, your commode would certainly be prone to instability and leakages, potentially bring about costly repairs and trouble. Therefore, comprehending the relevance of a correctly set up and maintained bathroom flange is vital for any kind of property owner starting plumbing projects or addressing repair service demands.
Why Proper Installation and Maintenance Matter:
Appropriate setup and meticulous upkeep of the commode flange are crucial for protecting the stability of your plumbing infrastructure. A thoroughly installed flange not only supports your bathroom safely in position however likewise forms a bulletproof seal, preventing the hazards of leaks and odours. By welcoming an aggressive approach to flange upkeep, you can minimize the risk of turbulent plumbing concerns and protect the tranquillity of your home atmosphere. Throughout this insightful overview, we'll unwind the complexities of commode flange installation and repair service, empowering you with the understanding and expertise to browse these crucial jobs adeptly.
Ideal Practices When Installing a Toilet Flange:
Guaranteeing a smooth toilet flange setup needs adherence to a set of finest techniques that assure toughness and functionality. Begin by thoroughly examining your devices and products, guaranteeing you have the necessary equipment for the task ahead. Choosing the proper flange product, whether PVC, ABS, or cast iron, is vital, as it identifies the long life and performance of your plumbing fixture. Additionally, reviewing existing plumbing problems, such as checking for damages or corrosion, is necessary for preemptively resolving possible problems and ensuring a smooth setup procedure. By adopting these primary procedures, you set a strong foundation for a successful bathroom flange setup, reducing the probability of future problems and helping with long-term upkeep.
When properly prepared, proceed with the mindful elimination of the old flange, adhering to a systematic approach to prevent creating damages to surrounding components. Utilize techniques customized to attend to persistent or rusted flanges, guaranteeing their swift and safe removal without endangering the integrity of the surrounding plumbing facilities. With the old flange removed, carefully mount the brand-new replacement flange, selecting one that fits snugly and safely right into location. Properly securing the flange to the floor using screws or adhesive is vital, as it ensures security and protects against future leakages. By sticking to these finest techniques throughout the installation procedure, you lay the groundwork for a robust and dependable bathroom flange setup that stands up to the examination of time.
Setting Up a New Toilet Flange:
- Selecting the Right Replacement Flange
- When mounting a new toilet flange, the initial step is to select the best replacement for your plumbing arrangement. Consider aspects such as the product of the flange, with choices including PVC, ABS, or cast iron. PVC flanges are known for their price and resistance to corrosion, making them a preferred choice for DIY lovers. Abdominal muscle flanges provide similar advantages to PVC yet boast included longevity, making them appropriate for high-traffic locations or commercial setups. Cast iron flanges, renowned for their strength and longevity, are ideal for installations where longevity is paramount. Furthermore, make sure that the replacement flange is appropriately sized and fits well right into area to produce a watertight seal and protect against leaks.
Safeguarding the Flange to the Floor:
As soon as you've chosen the appropriate substitute flange, it's critical to safeguard it effectively to the floor to guarantee stability and stop future concerns. Begin by placing and lining up the flange properly over the drain, ensuring that it rests flush with the floor surface. Depending upon the kind of flange and your certain setup preferences, you can secure the flange to the flooring utilizing screws or sticky. If utilizing screws, make certain to use corrosion-resistant alternatives to prevent rusting gradually. Additionally, adhesive can give a secure bond between the flange and the flooring, making sure a sturdy and reputable setup. By complying with these steps and taking the essential preventative measures, you can install a new commode flange with self-confidence, ensuring a long-lasting and leak-free plumbing fixture.
Best Practices When Repairing a Broken Flange:
Repairing a damaged bathroom flange needs thorough interest to information and adherence to finest methods to ensure an enduring solution. Begin by completely evaluating the extent of the damages and recognizing the underlying cause, whether it be deterioration, fractures, or imbalance. This examination will direct your repair method, allowing you to choose one of the most appropriate techniques and materials for recovering the flange to its ideal problem. Furthermore, take into consideration the bordering plumbing facilities and floor security to address any kind of potential contributing factors and prevent future issues from arising. By conducting a thorough evaluation and evaluation, you prepared for a reliable and enduring repair work procedure that settles the origin of the trouble.
With a clear understanding of the flange's problem and the aspects influencing its damage, proceed with the repair work procedure making use of precision and treatment. Relying on the severity of the damages, you might opt for repair work techniques such as epoxy putty, repair service flange sets, or partial flange replacements. Guarantee that the selected repair method efficiently deals with the particular problems available while preserving the structural stability and performance of the flange. In addition, take aggressive actions to enhance the fixed flange and stop future damages, such as applying sealer or waterproofing products to protect versus leakages and deterioration. By adhering to these best practices during the repair process, you can recover your broken flange to optimal problem, making sure the long-term dependability and efficiency of your plumbing system.
Types of Toilet Flanges:
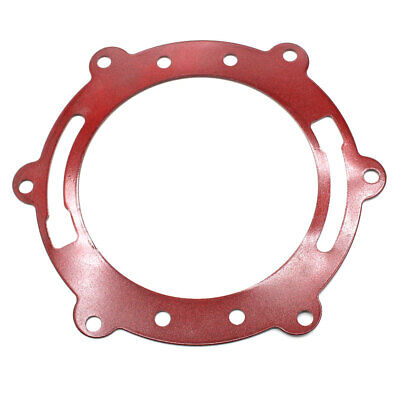
Understanding the different kinds of toilet flanges is crucial for selecting the most appropriate option for your plumbing needs. PVC, ABS, and cast iron are among the common materials made use of in toilet flange construction, each offering distinct benefits and factors to consider. PVC flanges, known for their price and deterioration resistance, are favoured for their simplicity of installment and durability. Abdominal muscle flanges, comparable to PVC in terms of affordability and simplicity of installment, are valued for their toughness and resistance to influences. On the other hand, cast iron flanges, renowned for their exceptional stamina and long life, are frequently preferred for high-traffic areas or commercial settings where durability is extremely important. By familiarising yourself with the features of each product, you can make an informed choice when selecting a commode flange that aligns with your details demands and choices.
Along with material factors to consider, toilet flanges additionally come in numerous design and styles to accommodate different plumbing setups and installment choices. Offset flanges, as an example, are developed to suit toilets mounted on floors that are not level or where the waste pipe lies off-centre. Similarly, repair service flanges, also called fixing rings or spacer rings, are used to resolve issues such as cracked or damaged flanges without the need for considerable plumbing alterations. In addition, adjustable flanges offer versatility ready, permitting accurate placement and fit throughout setup. By checking out the diverse series of bathroom flange kinds and styles offered, you can select the alternative that finest suits your plumbing setup and setup needs, making sure a smooth and trustworthy remedy for your washroom components.
Specialty Options:
Along with conventional bathroom flanges, there are specialty alternatives available to deal with particular plumbing obstacles and installation choices. One such option is the balanced out flange, which is designed to suit commodes mounted on floors that are uneven or where the waste pipe is located off-centre. Offset flanges include an one-of-a-kind style that enables the bathroom to be positioned at a mild angle, making up for unequal flooring or misaligned plumbing links. This ingenious option makes sure a protected and steady installation, eliminating the requirement for expensive and time-consuming floor leveling or pipe moving. By incorporating a countered flange into your plumbing configuration, you can conquer typical installation barriers and attain a professional-quality outcome with ease.
One more specialized alternative worth taking into consideration is the repair flange, additionally known as a repair service ring or spacer ring. Repair flanges are particularly made to resolve concerns such as cracked or broken toilet flanges without the requirement for considerable plumbing adjustments. These versatile elements can be set up straight over the existing flange, supplying a tough and dependable base for protecting the toilet in position. Repair flanges been available in different sizes and setups to accommodate different flange sizes and installation needs, making them a convenient and cost-efficient solution for fixing flange-related problems. Whether you're taking care of a small flange repair or a much more complex plumbing problem, integrating specialized options like balanced out and repair work flanges can simplify the setup process and make certain lasting efficiency for your shower room components.
Conclusion:
In conclusion, mastering the art of toilet flange setup and repair service is important for keeping a useful and leak-free plumbing system in your house. By comprehending the value of an effectively installed flange and sticking to best practices throughout the procedure, you can make certain the durability and integrity of your bathroom fixtures. Whether you're selecting the right sort of flange, carrying out repairs, or discovering specialty alternatives, attention to information and meticulous execution are vital. Regular upkeep and aggressive repairing can assist prevent costly plumbing issues and preserve the tranquility of your home atmosphere. Armed with the knowledge and abilities acquired from this detailed guide, you can deal with toilet flange installment and fixing with confidence, encouraging you to secure your plumbing system for years to come.
How to Replace a Toilet Flange
Turn off the water main and drain the toilet.
The first step in how to install a toilet flange starts with turning off the main water supply to the toilet by locating the knob on the wall behind it and turning clockwise. This will prevent water from refilling the tank after each flush, but won’t stop water from leaving the system.
Unfasten the nuts that hold the toilet to the floor
Unfasten the two nuts from the bolts that hold the toilet to the flange and floor. Use the adjustable wrench if the nuts don’t loosen easily by hand. Set the nuts aside to reattach the toilet when the flange replacement is complete.
Lift the toilet.
Prepare to remove the toilet. Keep in mind that the average commode weighs between 70 and 120 pounds. If you’re not confident in your ability to lift it yourself, ask someone to help lift it. Set it carefully on a drop cloth or newspapers.
Plug the drain pipe with a disposable rag to block unpleasant odors and gasses from releasing into the air.
Remove the old wax from the toilet flange
Now that the toilet is removed, you’ll see the outflow or sewage pipe with the flange. Remove the old wax that sealed the toilet to the flange and pipe with a putty knife.
Remove screws from the flange.
Find the screws (up to four) on the outside of the flange, which will need to come out. Use your multi-head screwdriver fitted with the corresponding screw bit to remove the screws.
Buy a new toilet flange
Measure the width of the outflow pipe’s mouth with the tape measure and make note of them. Put the old flange into a plastic bag to keep for reference and either go online or head to your local hardware store, plumbing supply, or home center and buy a flange of corresponding size, type, and shape. Having the old flange with you allows for a head-to-head comparison.
Purchase a correct-size wax seal for the new flange, too. The new flange should come with new bolts and screws; if not, buy those as well, checking for fit.
Turn the water valve back on.
Reattach the water supply hose to the inflow valve on the toilet. Make sure you’ve got it affixed tightly so there’ll be no dribbles or leaks later.
Turn the water valve back on and wait for the toilet reservoir tank to fill. Once full, flush it. Wait for the bowl to fill, then flush again. Do this two to three times to ensure proper function. If all works well, you have successfully completed the toilet flange installation project.
Final Thoughts
If the toilet is flushing correctly, run your hand along the floor around the toilet base. If the floor is dry, great! Clean up and congratulate yourself on doing the job like a pro! By learning how to fix a broken or loose flange, you’ve avoided a hefty service bill and future toilet issues.
https://www.bobvila.com/articles/how-to-replace-a-toilet-flange/

I'm certainly very occupied with How to Replace a Toilet Flange and I hope you enjoyed the entire post. Do you know another person who is occupied with the niche? Take a moment to promote it. Many thanks for going through it.
Call Today
Comments on “DIY Toilet Flange Installation - Easy Methods for Efficient Setup”